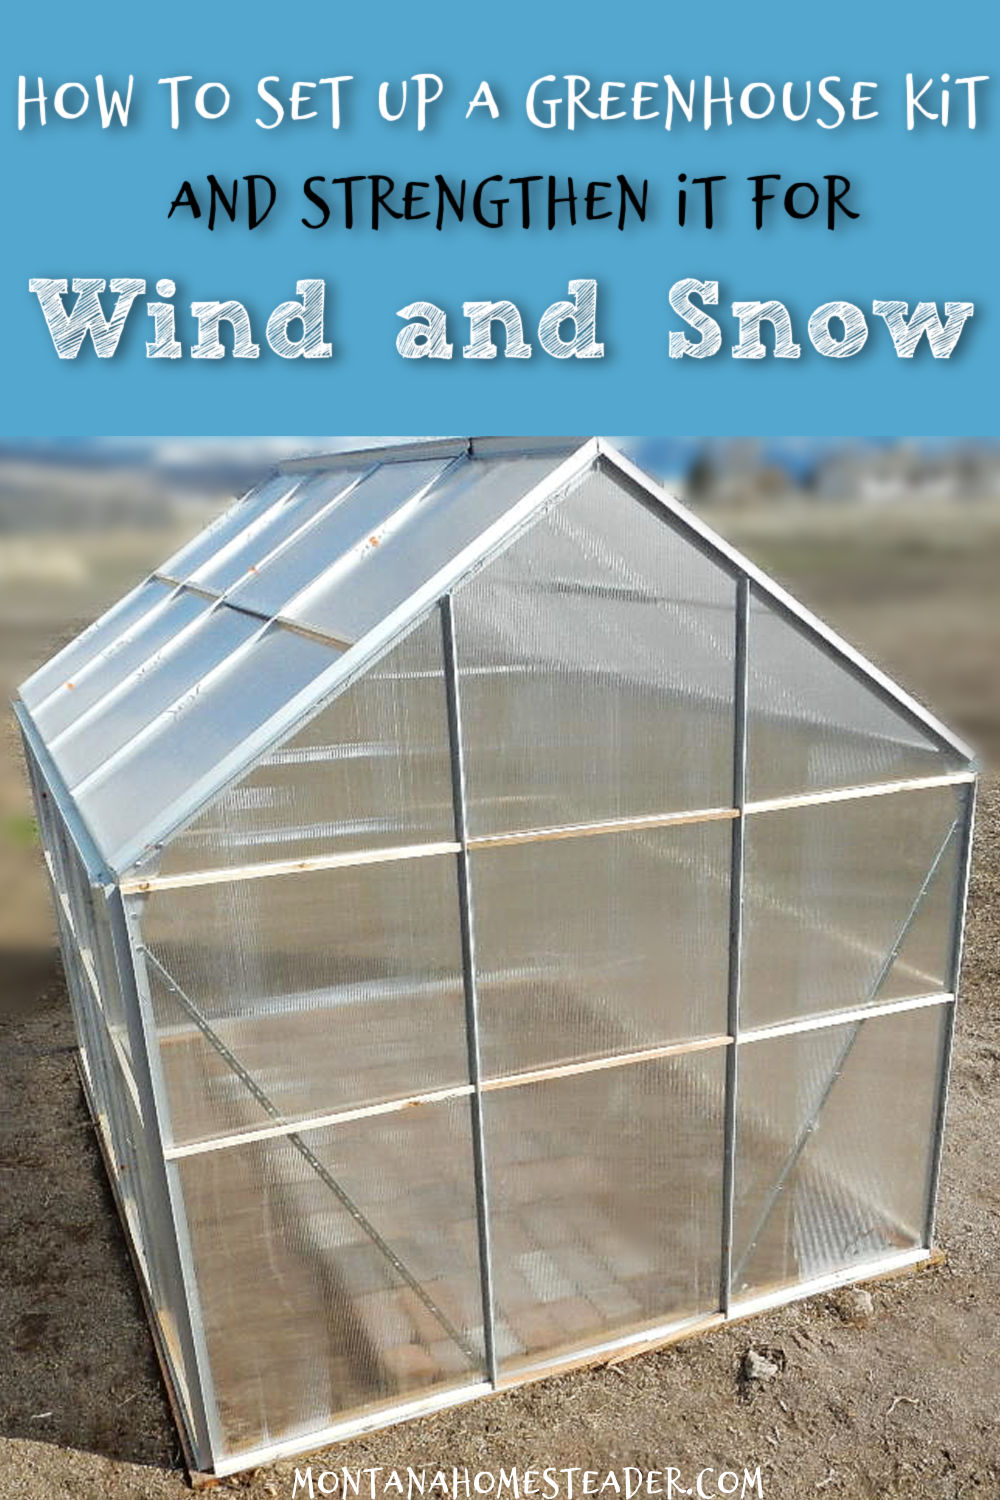
How to Set up a Greenhouse Kit
Last Updated on January 19, 2025 by Annie Bernauer
Living in Montana, we are no stranger to wind and snow so figuring out how to set up a greenhouse kit and strengthen it for wind and snow was at the top of my priority list! For our first greenhouse, we purchased a basic greenhouse kit and my handy husband figured out how to anchor it to the ground and add a few modifications to strengthen the greenhouse to make it more durable through wind and snow.
Is it cheaper to build a greenhouse or buy a kit?
The year we bought our first greenhouse, we researched greenhouses and hoop houses all winter. We were trying to decide what was the best fit for us in our price range and need for a durable greenhouse to withstand the wind and snow in Montana.
Initially my husband was going to build one since he’s a contractor and pretty handy when it comes to building things. I had fallen in love with the idea of building this geodome greenhouse and we were trying to figure out if it fit our budget to build one.
We also had oodles of other expensive projects on the homestead so that played into our decision of whether or not to buy a greenhouse kit or build our own. We’re all about DIY projects and building our own if it can save us money, like building our own Langstroth beehives for cheap!
At the time we were researching our greenhouse, we figured out that it would cost us close to $600 or more to buy the materials to build a geodome greenhouse. If we bought a geodome greenhouse kit it would be closer to several thousand dollars or more depending on the size. Yikes! Definitely not in our meager homestead project budget.
The greenhouse kit we bought
Then we found the perfect size greenhouse kit on super sale during a one day sale event at a store in town (This is the greenhouse kit we bought). The super sale price was $400. At that price my husband couldn’t even begin to buy all the materials he would need to build one.
Before we bought the greenhouse, we read the online reviews for it so we were aware of any issues people had with it, mainly being it’s ability to withstand heavy winds. My handy husband created a plan to address any of the issues people mentioned in the reviews. He figured out how we could beef up the greenhouse to withstand the gusty winds that blow through our valley and the heavy snows we get in winter.
Our new greenhouse was 6’x8′ and it had adjustable windows on the top. This was quite the upgrade in size for us since our greenhouse prior to that was 2′ x 6′.
All of the “additions” we did for added stabilization for wind and snow were done with parts and pieces we had left over from other projects on the homestead so weren’t an additional cost to the project.
We actually were able to repurpose some 4×4 lumber from the barn to use in our foundation which was another added savings for us!
How to set up a greenhouse kit
If you buy a greenhouse kit from a store and not second hand, it should come with directions explaining how to put together your greenhouse kit. Below I will explain how we anchored our greenhouse to the ground and added additional supports to strengthen it for wind and snow.
Site Selection
Picking the site for your new greenhouse is the first step before actually starting to install the greenhouse. When picking a location for a greenhouse, look for the following:
-A location that gets full sun. It’s best if your greenhouse can get at least 6-10 hours of direct sunlight each day.
-Take note of any surrounding trees or buildings that may create shade. Look at the location at various times throughout the day since the shade may shift as the sun changes direction in the sky. What looks like a great sunny spot in the morning may be covered in shade in the afternoon from a building or tree that you didn’t realize blocked the sun later in the day.
-A flat, level surface with good drainage
These site selection tips are pretty much the same ones we suggested when building a raised garden bed!
Gather tools and supplies
Before starting to put your greenhouse together, it’s helpful to gather your tools and supplies first. Some kits may come with screws or special tools to put the kit together, others require you to provide these. Read the manufacturers instructions to find out what supplies are provided and what you need to provide.
There’s nothing worse than getting all ready to start on a project and realizing you are missing key building materials and need to make a trip to the local hardware store before starting your project (ahem, yes speaking from experience here lol!)
If for some reason you are missing the manufacturer’s installation directions for your greenhouse kit, you can typically find them online with a quick internet search. If you can’t find them that way, contact the manufacturer and they should be able to send you an electronic version of the greenhouse installation instructions.
How do you secure a greenhouse kit to the ground?
Installing a greenhouse kit isn’t as simple as just putting the pieces together according to the instructions. A greenhouse should be anchored securely in the ground to prevent it from moving or more importantly blowing away.
Just like when building a house, a greenhouse needs to be anchored to a sturdy, level foundation to withstand the test of time and elements in nature.
Supplies needed to anchor a greenhouse to the ground:
- Four 4×4 treated wood posts matching the measurements of your greenhouse length and width
- Four concrete pier blocks with metal brackets attached
- A shovel
- Four stakes to mark the corners
- Tape measure
- Level
- String
- 4 angle corner brackets
- Bolts
Directions to anchor a greenhouse to the ground:

Step 1: Measure the dimensions of your greenhouse on the ground and place a stake at each corner. To ensure it is square, measure from corner to corner. You should get the same measurement for each one. Once satisfied with your measurements, string a line up around the perimeter by wrapping the string one full circle around each stake to secure the string.
Step 2: Dig a trench around the perimeter following the string line. The trench is where your 4×4 wood foundation will run.
Step 3: Decide where you want to place your concrete piers. For our 6’x8′ greenhouse we placed them a short distance in from each corner post on the eight foot sides of the greenhouse. Dig a large hole where each concrete pier will go.
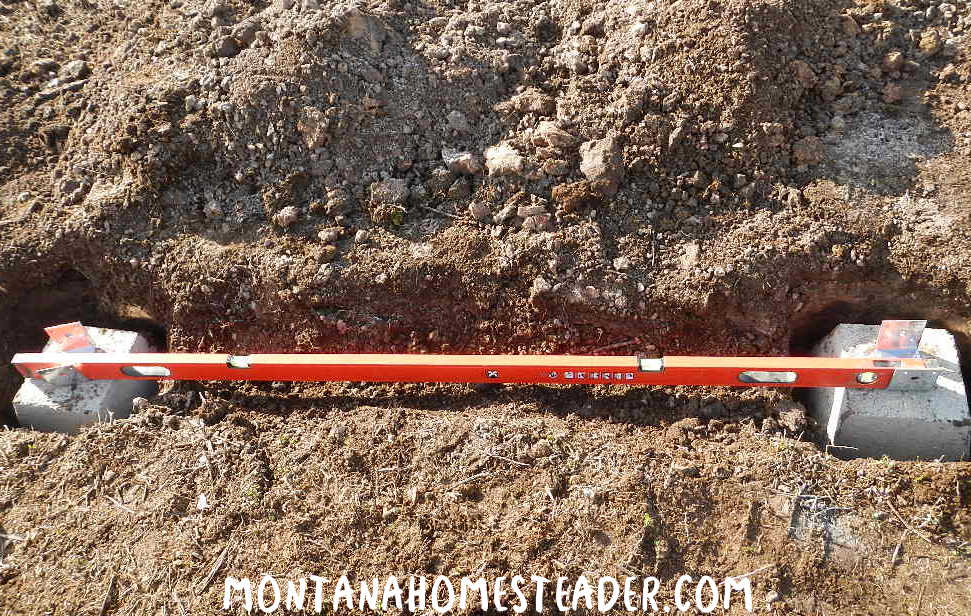
Step 4: Place the concrete piers in the holes. Using the level, adjust them as necessary to ensure they are level.
Step 5: Cut the 4×4 wood to the lengths of your greenhouse. Once cut, place them in the trenches around the perimeter of the greenhouse on top of the concrete piers. On the long side of the greenhouse, the wood should sit in the metal brackets attached to the concrete piers.

Step 6: Using the level, make sure all the 4×4 wood surfaces are level. To be precise, take another corner to corner diagonal measurement for each side to make sure your foundation is still square. If not, make adjustments as necessary. You can either gently push the wood or use a hammer to gently tap the wood in the direction you need it to move to get it square.

Step 7: Bolt the wood to the metal brackets on the concrete piers. Then bolt the wood corners together with angle brackets in all four corners.
Step 8: Back fill the trench you dug and pack it down. We also raked and leveled the dirt on the interior of the foundation since we knew this would be easier to do at this step without the structure of the greenhouse built.

Step 9: Attach the bottom rails of the greenhouse to the 4×4 wood. My husband screwed down through the metal frame every foot. Assemble the greenhouse kit according to the manufacturer’s directions.

How to strengthen a greenhouse kit to withstand wind and snow
If you’re building your own greenhouse with a sturdy wood structure you likely won’t need added stabilization. Our worry about buying a metal framed greenhouse kit was having a weaker frame than a wood frame.
What we really liked about the greenhouse kit we bought was it came with sturdy, clear plastic panels instead of thin pliable plastic sheeting. The way the wind whips through our valley, we figured we’d have to replace plastic sheeting every few years which would be an ongoing large expense.
Metal Cross-bracing
Since we wanted to beef up the frame of our greenhouse, my husband added a few metal cross braces.

To do this, he simply cut some metal shelving strips we had left over from another project. Then he bolted it to the frame of the greenhouse to secure it. Once these cross braces were added, it was amazing how much sturdier the greenhouse frame felt.
Wood Panel Supports
The other thing we noticed with the greenhouse kit we bought was that the plastic panels rattled a bit when the wind blew.
To beef up the cross bracing on the plastic panels, my husband cut some scrap 2×4 wood down to 1/2″x 1/2″ square pieces.
He cut the length to fit horizontally between the vertical metal frames of the greenhouse. The wood pieces fit snugly and sandwich the plastic panels. This not only prevents any rattling but it also makes the whole structure feel a lot more solid and sturdy.

How long can I expect my greenhouse kit to last?
Greenhouse kits like the one we installed at our old homestead often are made with polycarbonate panels. I’ve read the life of polycarbonate panels is anywhere from 5-10 years.
The fourth year we were using the greenhouse kit we installed was the first year we had any issues with the polycarbonate panels. One of the roof panels got a crack in it somehow. This created a weak spot so when a gusty wind storm came through that year, that greenhouse panel was ripped out by the wind and went flying. I think we eventually found it a ways away on our property but it was too damaged to use.
My husband made a temporary replacement window by make a wood frame out of scrap wood that fit the dimensions of the missing panel. He then wrapped clear, thick plastic over the wood frame and used a heavy duty stapler to staple it in place. This replacement panel didn’t look too pretty but it worked great!
Snow Removal on a Greenhouse Roof
If you live in an area where it snows, one of the key things you need to do to increase the longevity of your greenhouse is remove snow from the roof in the winter. Even though we added stabilization to the frame of the greenhouse kit, the polycarbonate panels are not sturdy enough to withstand the weight of a lot of snow.
Every time it snowed, I went out the greenhouse with a long handled broom and wiped the snow off the roof. I didn’t trust using a heavy snow shovel to push the snow off because I didn’t want to take a chance of damaging the polycarbonate panels.
We moved from our old homestead five years after installing our greenhouse. It was the middle of winter when the ground was frozen and covered in deep snow. Sadly we were unable to move our greenhouse and had to leave it on our old homestead.
When we moved, the greenhouse frame was still solid and sturdy. The only weak parts of the greenhouse kit were the polycarbonate panels. It seemed that with time and sun exposure the panels started to weaken and were more prone to cracking. These can be replaced with the cheap DIY method my husband did or you can buy polycarbonate paneling and cut it to size for replacement.
What to use for the floor of a greenhouse kit
First you need to decide if you plan to grow any plants in the floor of your greenhouse. Some folks prefer to grow only seedlings in their greenhouse or plant bigger plants in pots. Since we live in a cold climate and have a short growing season, I wanted to use our greenhouse to extend our gardening season by growing plants in the soil in the ground.
I decided that I wanted a stone walkway down the center of the greenhouse so when I watered seeds in there, I wouldn’t be standing in a big mud puddle. I left the soil open and exposed on the edges of the greenhouse so I could plant directly into the soil and use our DIY milk jug waterers to grow vegetables when it was too cold to use the hose or work in our large gardens.
For the floor of our greenhouse, we repurposed bricks we found around the property (you can see the start of the floor in the picture under the metal cross bracing section above).
At some point years ago, a former owner had used bricks to landscape around all the shrubs and flower beds around the house. Then the last owners picked up some of them and made random piles of bricks around the property. The piles are an eyesore so we were thrilled to have a way to reuse some of the bricks!
I covered the center walkway of the greenhouse with bricks. We even found a few half bricks to fit in the small space at the end. I didn’t put any bricks along the side of the greenhouse. The shelves for the greenhouse are tall and we figured if they sat a couple inches up on top of bricks some of them wouldn’t fit well.
The first day after our greenhouse installation was complete, it actually snowed. I went outside to the compost pile near the greenhouse and decided to step inside to see just how warm it was.
It was freezing and windy outside so I didn’t have high expectations for much warmth in the greenhouse. The greenhouse appeared strong and sturdy with our modifications and didn’t seem to be fazed by the gusty wind blowing around.
When I stepped inside the greenhouose, I was amazed at how toasty and warm it was. There was even some humidity and condensation on the inside walls of the greenhouse. I knew then that our garden seeds would love our greenhouse!
How to Grow Seeds in a Greenhouse
Now that you have your greenhouse kit all assembled, anchored to the ground and cross braced with supports for wind and snow, it’s time to start planting and growing!
We have a whole post dedicated to tips on how to plant seeds and grow seedlings in a greenhouse. This covers how to set up shelves, watering methods and how we utilized passive solar to heat our greenhouse.


Thank you so much for this. We got a greenhouse kit last season and the frame and foundation are solid but with every windstorm (which we have a lot of) my panels get stripped. It’s more than a little annoying for me and my poor neighbors who keep finding panels in their alfalfa fields. We are going to try bracing them with wood like you did. Keep your fingers crossed for us!
I’m so glad this was helpful for you, I hope it helps!