How to Render Beeswax from Honeycomb
Last Updated on January 16, 2026 by Annie Bernauer
When we started beekeeping this spring, I knew one of the benefits would be harvesting our own beeswax. I looked forward to the day I wouldn’t have to buy beeswax to use in our homemade lip balm and dandelion salve. What I didn’t know this spring was exactly how we would harvest or process the beeswax. I started researching it and asked around. What I found out is that learning how to render beeswax from honeycomb is easy!
 Once a week my husband goes out to to our beehives to do a hive inspection. Anytime he finds honeycomb that the bees built in odd places he removes it. Sometimes they start building comb on top of the frames. One other time the bees started building comb out so far they attached the frame to the inside of the box.
When he removes the honeycomb, he puts it in a glass jar. He has been collecting the comb for the last few months and we had a decent pile built up. I want to make some more medicinal salves and need beeswax so figured it was the perfect time to try rendering our own beeswax.
How to Render Beeswax
This whole process took me about 30-45 minutes and then another few hours for the wax to cool. This is a one step filtering process so there is no need to melt the wax down and filter it more than once.
I read a few online tutorials on rendering beeswax that were very time intensive and required melting the beeswax down two times. One time it was melted straight into a pot of water and large debris scooped out with a slotted spoon. The second time the beeswax was melted down, it had to be poured through a piece of cheesecloth to strain it.
That sounded way too time intensive for me! The method we used is much easier and quicker to render beeswax from honeycomb.
Materials needed:
-old large metal pot (you will end up with some wax on it so you probably don’t want to use your best cooking pot!)
-fine cheesecloth (this is the kind we use)
-honeycomb
-chip clip or twisty tie
-metal tongs
Step 1: Lay a large piece of cheesecloth on a flat surface. Place the honeycomb in the center of the cheesecloth. It doesn’t matter if there is debris like dead honeybees mixed in with the honeycomb since the beeswax will be filtered out.

Wrap the cheesecloth around the honeycomb forming a bundle with all ends of the cheesecloth gathered snugly in your hand. Use a chip clip or twisty tie to secure all the ends of the cheesecloth together. Make sure the ends of the cheesecloth are clipped tight so no debris leaks out into the filtered beeswax.
 Step 2: Fill the pan with water and place it on the stove. Place the cheesecloth bundle in the water. Turn the stove on to a medium/low heat. As the water heats, the beeswax honeycomb with start to melt and seep out of the cheesecloth leaving the debris on the inside of the cheesecloth.

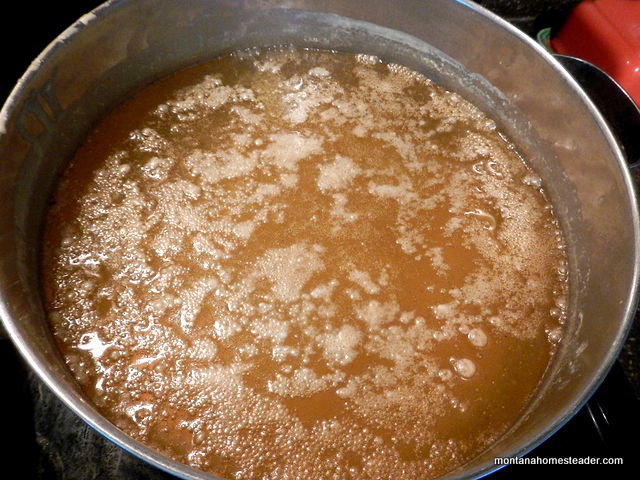
As the beeswax starts to melt, you will see the yellow liquid wax floating in the water.

Step 3: Once most of the wax appears to have melted out of the cheesecloth bundle, you can use a pair of tongs to squeeze the small bundle left. This will help extract the last of the beeswax from the bundle.

Step 4: Remove the cheesecloth from the pot of melted beeswax and water. Allow the pan and contents to cool, which can take a few hours. The beeswax will form a layer on top of the water when it is melted. As it cools, it will form a solid layer of beeswax on top of the water. Ours had some little bubbles on top that were formed when heating it. These cooled off and solidified.
 Step 5: After the beeswax cools and hardens on top of the water, gently push down the edges of the beeswax. It will separate from the pan. Remove the solid round of beeswax from the pan. Ours had a few air bubbles on the bottom layer that had water trapped in them. I popped the air bubbles and laid the beeswax on a cloth towel on the counter to dry out. Now you have a beautiful round of filtered beeswax rendered from your very own honeycomb!
 If you’re like me and curious to see what was left inside the cheesecloth, open it up and take a peek! Ours had mainly honey bee body parts that were stuck in the comb along with some other random debris. We’ll probably have more honeycomb to render more beeswax in the next few months. Instead of throwing out the cheesecloth, I placed it in a paper bag in the pantry and plan to reuse it next time we render beeswax.

Now that we have a nice round of filtered beeswax, my next project is to use it to make some homemade medicinal salves like dandelion salve and medicinal yarrow first aid salve.
May 2015 update:
Since I posted this last year, we’ve rendered more beeswax from our honeycomb. This week we processed a large batch of comb saved up since the end of last summer. In the pile was a bunch of dark colored brood comb. Some of it even had dead larva in it.
We weren’t sure if we could (or should!) process this into beeswax. I did a quick internet search and read that some people don’t bother with it since supposedly it does not have as much wax content as honeycomb. Other folks do process brood comb into beeswax since there is some wax present.
Since I was already processing a big pile of honeycomb, we decided to go ahead and process the brood comb too. What did we discover? Well there is definitely beeswax to be rendered but there is also a lot of leftover crud inside the cheesecloth.
When processing just honeycomb, it wasn’t too full of crud except maybe for an occasional dead bee. Since there was so much crud from the brood comb, the one layer of cheesecloth was not sufficient to filter out all the fine dirty particles from the beeswax.
When rendering beeswax from brood comb, I highly suggest doubling or even tripling the layers of cheesecloth!
I learned this the hard way. Once I discovered our beeswax had some small particles of crud in it, I had to wait for it to solidify. Then I broke it up into pieces and wrapped it up inside two layers of fine cheesecloth and reprocessed it.
We were then left with a beautiful, dark golden one pound block of beeswax that was nice and clean! Next time I’m planning to process beeswax and there is brood comb in the pile, I’m going to save myself an extra step and just double or even triple the layers of cheesecloth from the start!

How to Use Rendered Beeswax
There are so many uses for beeswax rendered from your beehives. One of the easiest things to do is make beeswax candles, whether by hand dipping or pouring hot wax into a jar with a wick in it.
You can make homemade body care products and medicinal salves with beeswax. Here are some of our posts you can try:
We also have several great books in our home library with lots of recipes and craft projects using beeswax that we highly recommend:
–Honey Crafting: From Delicious Honey Butter to Healing Salves
–Beekeeper’s Lab: 52 Family Friendly Activities and Experiments Exploring the Life of the hive
–The Benevolent Bee: Capture the Bounty of the Hive Through Science, History, Home Remedies and Craft


This is fantastic!!! We just got bees in the spring and yes, they build comb in inappropriate places in the hive. On one of our first inspections there was comb in the entrance of the feeder. We had to clean it out and we had nothing to put it in so we scraped and put on the ground. We felt terrible to waste it! Now we bring a container with us, but I had no idea what to do with it. Thanks so much for the great tutorial.
Hey there friend, your statement “we had nothing to put it in so we scraped and put on the ground” made me realize that as a new beek you might not realize that leaving honeycomb on the ground in the bee yard can attract pests (possums, mice, etc.) and encourage hive robbing. Extra incentive for rendering that burr comb down to use! Happy keeping!
Extremely helpful article. We live in an high rise apartment complex in Bangalore, India. We had beehive harvest for two days. I bought 1 Kg of Honey. My wife reminded me to buy beeswax as well as I have been toying with the idea of making scented candles at home mixing wax and patchouli essential oil. We had bought some of these candles in the US during our visit an year back.
I wanted to know make candle at home. I searched for the process and landed here. Thank you very much. It is not only helpful but also a fewer step process. I am delighted.
Thank you.
Shankar HN
Bangalore, India
I am about to make my first beeswax for making candles. Hope this works. Thanks 😊
PS– we have lots of bee lovers on our blog hop if you would like to share there also….http://farmgirl-unleashed.com/2014/07/farmgirl-friday-blog-hop-166/
Thank you for stopping by Debbie! I will add your blog hop to my list of weekly blog hops to link up to 🙂
This is very timely! I have a milk bucket full of honeycomb pieces from my in-laws to process and now I know exactly how to do it. Thanks for sharing such a great tutorial!
Wow, a whole milk bucket of honeycomb to process!! We just had a small amount this first time around but I can’t wait until we have more once we harvest honey. Glad you found our tutorial and have fun rendering your beeswax 🙂
I am about to make my first beeswax for making candles. Hope this works. Thanks 😊
Thanks for the one-step rendering process, very convenient and tidy! Will try it on the next go-round!
Oh, this will be SOOOOO much easier! I did the boil-melt down-skim-start over method and it took forever! Now I have to go try your method-I know it’ll work since I already did it the hard way! 😉
I use the bottom half of an old Styrofoam ice chest lined with aluminum foil and a heavy plastic or glass container to catch the wax. I rubberband the cheese cloth or paint strainer with the comb over the container filled with 1′ of water then put it in the sun with a pane of glass or plexiglass over the whole thing. When it’s sunny, it is fast. I can see it and add more comb as it melts. Be careful as it gets really hot! The stuff left over is called “slum gum” and makes an excellent fire starter. Put some in an empty paper toilet roll and you get fire quickly. I save ours for when we go camping.
SLUMGUM IS SUCH A WONDERFUL WORD> IT ALSO MAKES GOOD COMPOST> THANKS FOR THE TIP ABOUT FIRELIGHTERS!
Thanks for this information! We are planning to get bees this next spring and I am hoping to get some honey and beeswax just as you did. We are going to use the top bar (Kenyan type) of hives because we got some simple plans to make our own hives. Wish us luck!
Oh, this is clever! I have ‘tons’ of used honeycomb laying around, because we haven’t had time for making a sun melter. This is just the perfect method for us. Thanks a lot for sharing!
I put my comb in an old pair of nylons, and tied it shut, then melted it in my old crockpot (now just used for beeswax!)–with a little water, and it was super easy!
Nylon!! Tysm , that’s awesome idea.
Hi. Thank you for clear and easy to follow instructions. It’s our first year of beekeeping and we’ve been busy collecting the honeycomb but wasn’t sure what to do with it. Coming across your website was a great find and after melting our fist batch last night (didn’t do too much) it was so easy that we’ve just put the last batch on. Thank you for sharing and looking forward to the next stage.
the only beeswax I have came in a jar of honey. How do you remove the remaining honey from the comb? Thank you!
We used a large honey extractor to extract the honey from our comb since we had quite a bit of honeycomb. For just a small amount of comb, we lay the comb over top a glass jar or bowl and let it drip out for a day or two.
You can also smash it with a spoon or tater masher, and put in a sieve over a small mason jelly jar.. it will seep out better.. we put our small comb like that on our gas oven overnight.. just the warmth of pilot light was enough to soften honey to flow better!
I remember chewing mouthfuls of comb to extract the last bit of honey in it. Then you spit it out, since people can’t digest it.
This is awesome. I have done ours before, but it was the multistep method. Just in time for me to render beeswax again this week and looking forward to trying this out!
I would like to start a honey beehive but I have no idea where to buy one. Any ideas?
Mann Lake or Dadant are both online and very fast delivers for your hives and equipment. You can also order bees from Mann Lake. We buy from a supplier a couple hundred miles from our home. We order this time of year the make the drive in the spring, April or early May. In my opinion, better to make the trip rather than having them come in the mail. We like getting bees in “nucs”. They are a bit more expensive but you get a colony that is already started with brood and pollen. The packages need to have an existing hive where you dump in the colony then introduce the queen over a few days. Then she will start laying if the rest of bees have had time to build up broodcomb.
I just used your method for rendering bees wax and I am absolutely sold on your method. It was fast, efficient and did not make a mess. Except for the utensils I used there was really no clean up. The wax stayed where it belonged. The pan, bowl and tongs are strictly for rendering wax and the cheesecloth was just tossed, as it will be a while before I would need to use it again. Thanks for posting this hassle free method of rendering wax.
I have used the cheesecloth for fire starters. Cut it into strips, put it in an empty toilet roll with some dryer lint at both ends.
Where/how do you store your beeswax?
Hi thanks for this, I have four buckets of wax to try with. Some of the wax has fermented honey in it, can I still extract the wax? 2nd question, can I use the water under the solidified wax to feed my bees?
Thanks
Charles
FB: Chomwedzi Apiculture
Another thing you can do with the leftover debris is use it as a fire starter for outside fires 🙂 Roll it up and place in a brown cardboard toilet paper tube – not the bleached white ones.
Mine has not rendered properly its very soft and hasn’t hardened at all what did I do wrong
That’s what happened to mine too. I’m trying remelting. Any tips are appreciated!
hey, sorry if i sound like a dolt but is there anymore processes that need doing for it to be candle worthy? It’s just that you said you were using it for health balms and such so i don’t know if they would have the same requirements.
Hie my adviser, to me you are teacher. I have started a beekeeping project. Currently I’m using traditional hives. What was lacking to me was the person with the information, but now I’m relieved. My apiary is 100m from the yard. I own 114hectres land I’m a small scale farmer. I want to the whole farm into apiary, so I don’t want to miss an post of you. I’m in Zimbabwe. I want to know from the first stage of how the apiary should be. I just had of top bar hive may give me the measurements on how to build it.
Yours interested reader
Pio your bars have to be exactly 32millimetres wide….. That is most important
What is the best type of candle wick to use? I go to Amazon and am overwhelmed by all of the choices! We have bees for the first time and I want to attempt to make a beeswax candle from our honeycomb.
Is the any use for the liquid left over in the bottom of the pan. It seems to be very honey rich and I don’t want to waste if possible.
I am wondering the same thing…what to do with the liquid in the bottom of the pan! Just now I am using the cheesecloth method of Montana Homesteader and it is soon easy compared to how I did it last year.
Feed it back to the bees!
You can also use the honey residue to cook with.
Make mead 😉
For the stuff with loads of brood and old cacoons in it, i melt it in the sun or in an oven, in a long casserole dish. I get a rock or a brick to prop up one end, put some water in the other end and either sit it out in the sun or turn the oven to 180. The wax melts and goes on top of the water, the crud stays at one end of the melter. There’s still some crud, but your method would filter it out well. i only do this with the super dirty comb.
The real name of crud is slumgum…
We have about 6 5-gallon pails of wax that we haven’t bothered processing since other methods are so painful. We tried yours, and for a few dollars worth of cheeecloth are sold. Thanks!
Thanks for explaining your method, it seems a lot easier the others, I’m trying it right now!
Someone mentioned using nylons/stockings instead of cheesecloth…does anyone know if this will work?
I’m not sure if the nylon will stand up tonthe heat. However I have seen folks use nylon stockings and the “crush method” of harvesting Honey.
I have used nylons in the past and they work great
Just did this procedure. It was perfect. I have done others in the past, but many more steps.
Exactly as you mentioned I remove all the odd shape comb the bee start so it doesn’t continues, this time it had a lot of larvae it. Was able to save two bees and remove most for the birds. Circle of life.
But the cheese clothes showed me what larvae I misses. Not skimming the surface. Great time saver. Thank you for sharing. God save the Queen.
Hi, I am from the Philippines. Is the final product made from your process malleable enough for use by children in classroom use ?
Thank you for the info! I have also been overwhelmed different methods I have researched. This is very timely for our first hives and I feel less intimidated now. Going to try some lip balm and this year and maybe hand salve depending on our harvest!
SOAK BLACK BROOD WAX in WATER IN A BUCKET AND AT THE SAME TIME BREAK IT UP BY HAND. THEN LEAVE IT TO SOAK FOR TWO DAYS> THIS SATURATES THE COCOONS PREVENTS THEM FROM ABSORBING TOO MUCH MOLTEN WAX> THE RESULT IS THE RENDERING PROCESS IS MORE EFFECTIVE…………….
Ilan pong honeycomb ang aming kailangan pag gumawa kami
Hi,
We recently had an old, dead, tree in our front yard at work collapse and fall apart. The honeycombs are definitely dark and semi firm; is it possible to use the honeycomb still? For example, can we make candles or something out of it still or re-purpose it in anyway?
I personally use darker comb for candles, they turn out quite lovely!
Great information and allowed me to be successful during my first hive harvest! Thank you!
Thank you for the information regarding the bees wax. I’ll try it tomorrow. Moved my first wild swarm Into my new hive last night but not sure I got the queen. But I did get a lot of honeycomb.
Congrats on capturing a wild swarm! I bet the comb from the wild hive is interesting to look at. I always like to see the differences in how they build comb in a wild hive compared to on the frames in a bee hive.
I love this!! Thank you so much for the tips on how to make beeswax. It looks like I’m making “bee tea” when it’s brewing in the pot. 🙂
Glad you found it helpful and I love the idea of “bee tea” which really is what it looks like!
I used the double boiler method and my “wax” is super dark (amber.) The color doesn’t bother me, but the wax doesn’t seem to be solidifying and it’s almost 24 hours later. I didn’t rinse or process the honeycombs except by melting in the double boiler, then straining through a fine meshed strainer then cheese cloth. What do you think the problem is? Oh, I also used a few drops of essential oil in each votive. Please advise. I cannot find any info on the web about my specific result.
That is odd that it has not solidified, I’ve never had that happen when rendering beeswax! I wonder if there was a reaction to an essential oil? I make soap and I know there are certain additives, like specific essential oils, that can cause the soap to react negatively and cause issues so I wonder if that could be the cause with your wax. I’m sorry I don’t have a definite answer for you since I’ve never had this issue before!
I have not done any of this yet,. Just reading Patricia’s experience, I think the wax does not separate because no water is used (if I am reading correctly). If the honey is not dissolved in water, the wax still has honey mixed in. Honey dissolves in water but wax does not. Both honey and wax will melt with heat, but the water will separate the two.
I’m having the same problem with no separation. I haven’t added any oil but I also haven’t added any water. I’m remelting. Maybe I’ll try adding water….
I’ve only ever rendered beeswax by adding water. I’ve found that even if there is some honey in the comb, it will mix into the water and separate out from the beeswax when rendering by following the steps I explained in the post. I hope it worked for you when you tried adding water, good luck!
I used your method for our first batch of honeycomb and it was so easy and worked perfectly! Is there s way to separate out the honey that is left behind with the water? I tried simmering and reducing and ended up with a dark brown liquid almost like a maple syrup. It smells very good but I’m not sure if it’s edible and if so how I would use it. Any suggestions?
Glad to hear it worked well for you! When we have a bunch of comb that has some honey in it, I put it on our super fine mesh bucket top strainer (this is the one we have https://amzn.to/2PwnGdd) that we use when straining our honey during harvest. This allows the honey to drip out of the comb for use. Then I take that comb and render it. I personally have not attempted to use the water left over after rendering since I try to get as much of the honey out of the comb as I can before rendering.
Thanks for explaining this, it is so easy and I can’t wait to start rendering my bee wax. Michael from Cameroon
Seems like I have a lot of wax on my cheese cloth when I pull it out. Is this normal or am I dining something wrong?
I’ve been doing precisely that. In fact I just picking little pieces of was from my teeth as I was reading this article. I bought a piece of Wildflower Comb Honey about 1″ x 3″ and started eating it with a fork from the clear plastic case that it came in. Yum! Being a candle fanatic I immediately thought “I have to save this wax. I feel foolish about the amount of money that I spent to get this but this woodsman of suburban roots has zero knowledge in beekeeping. My two favorite smells are warmed White Pine sap and melting beeswax. I can’t wait! Tossing a chunk in this regular 6” pillar candle burning in front of me now.
Hello!
Fellow Montana beekeepers here!
So we have tried, and failed twice to render our wax! The first time we tried with the cheesecloth.. but we also used brood comb.. and it emulsified!
Just yesterday we gave it another go, after DAYS of cold soaking the comb to “clean” it first! We melted it all down, scooped some goop.. set it aside to harden…. and nothing. It hasn’t hardened!? For something that is shown to be so simple, we are really struggling and becoming discouraged when it comes to filtering our wax!
Would you possibly know why, or have any suggestions as to what we should do!?
Old panty hose is much easier than cheesecloth. Just ask your friends to dig around in their drawers!
I am just wondering what you did with the honey before you headed the honeycomb? Did you extract it first?
~Siobhan
But how do you process the honey out? We had our bees relocated and the beekeeper left us a bunch of honey filled comb- is there a way to separate it without getting wax into the honey? Thanks.
Hi from the UK! Tights work really well for filtering out the fine stuff (pantyhose to you in the US!). I wrap the comb in cheesecloth/muslin then pop that in a leg of the tights. Double filtering in 1 step x
I have processed mine and have some beautiful yellow wax but to me it doesn’t have that wonderful beeswax smell. It still smells like the old stale smells of the dead bits and pieces that were in it before refining it.
I’m not sure how to avoid that when we would store the wax scrapings and not render them until a later date.
Any tips?
Hi
Thank you for the excellent applied article.