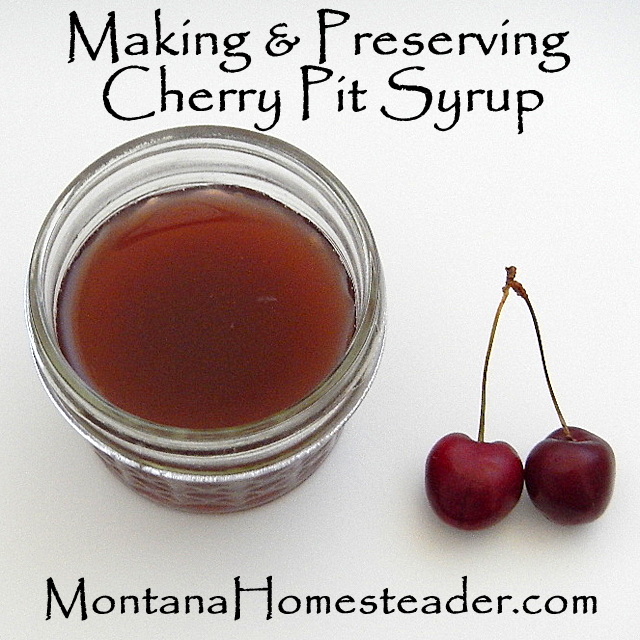
Making and Preserving Cherry Pit Syrup
Last Updated on November 25, 2014 by Annie Bernauer
Have you ever pitted a whole boat load of stone fruit and had a big ol’ pile of pits left at the end? Often there is a little bit of fruit still stuck to the pits. I always hated just throwing them out. Then I came across the idea of making stone fruit syrup. A few years ago I made plum syrup and it was delicious! This year when we pitted and preserved our cherries, I saved all the cherry pits and made cherry pit syrup. It turned out so yummy and was a great way to use the last little bit of fruit left before throwing the pits out!
Our family loves to eat pancakes with maple syrup on top. Since the maple tree on our property is to small to tap, we have to buy maple syrup for our pancakes. Unfortunately maple syrup is quite expensive. Making homemade fruit syrup is a great way to serve a more cost effective syrup with our pancakes. We also discovered that homemade stone fruit syrup makes a great addition to our homemade yogurt smoothies and is a delicious topping for vanilla ice cream!
Making Cherry Pit Syrup
Making cherry pit syrup is pretty easy. You can actually make this recipe with any stone fruit like apricots or plums. We use honey to sweeten our foods instead of sugar. This is our personal preference, especially since we have our own honeybees to harvest honey. You can use sugar in this recipe if you prefer.
I had just finished pitting and preserving about a gallon of cherries when I made cherry pit syrup. To use up the cherry juice on the pitter and in the bottom of the cherry bowl, I slowly poured a cup of water over them with my glass measuring cup underneath to catch the cherry bits and juice that poured off. I added more fresh water to make it two cups and used this for the syrup for added flavor.
This recipe makes about 2 cups of syrup and takes about half an hour to make.
Ingredients:
–1 cup cherry pits
-2 cups water
-2 cups honey (or unrefined sugar)
Directions:
1. Place the fruit pits, water, and honey into a saucepan. Slowly stir the ingredients and bring to a boil.

2. Reduce the heat to low and simmer for 25-30 minutes.
3. Remove from heat and cool.
4. Pour the syrup through a fine mesh sieve to strain out the pits and fruit bits.
Preserving Cherry Pit Syrup
There are two different ways we’ve preserved stone fruit syrup. If you don’t have a large batch and think you will use all the syrup within a week or two, it can be placed in a jar in the refrigerator. We always have a large enough batch that needs to be preserved for future use.
Method 1: Freezing.
Freezing is the easiest method to preserve stone fruit syrup if you have the space in the freezer to store it. The morning I was pitting and preserving cherries, I was also working on cleaning and preserving huckleberries. I didn’t have the energy to deal with canning that morning so opted to freeze the cherry pit syrup. I’ve frozen syrup in small 4oz glass canning jars (you can find them here) and I’ve also frozen syrup in ice cube trays. The nice thing about the ice cube trays is the small quantity. If you only need a small amount of syrup, only get out one or two cubes to thaw. Once the cubes are frozen, I removed them from the tray and put them in a zip closed plastic bag to store them in the freezer.
Method 2: Canning.
A couple years ago when I made stone fruit plum syrup, I had a large enough batch that I canned it. I again used the small 4oz glass jam jars to can it in since these are the perfect size for our family. The syrup needs to be processed for 10 minutes in a water bath canner and don’t forget to adjust canning time for altitude.
Making syrup with stone fruits is a great way to make a delicious low-cost syrup that doesn’t have all the unhealthy junk in it like cheap syrup you buy at the grocery store. After making and preserving cherry pit syrup this week, we have enough syrup for at least five or six pancake meals for our family. We’re hoping to make plum syrup again this year if we’re able to harvest plums from our friend’s tree in town. Then we’ll be well stocked and hopefully have enough homemade stone fruit syrup to last our family for the next year!

We joined with some fellow bloggers to share different methods of how we preserve food. Below you will find a list of links to click on to be taken to a new blog with helpful food preservation information and tips. Happy preserving!
Mom with a PREP – How to Dehydrate Ginger and Make Ginger Powder
Preparedness Mama – Make Jam Without Pectin
Mama Kautz – Dehydrating
Busy B Homemaker – Freezer Jam
Ed That Matters – Anyone Can Do It: Fool Proof Food Storage
The Apartment Prepper – Easy Marinated Mushrooms
The Homesteading Hippy – How to Use Your Pressure Canner
Montana Homesteader – Making and Preserving Cherry Pit Syrup
Are We Crazy or What – How to Dehydrate Cherries
Your Thrive Life – How I Preserve Food: Meals in a Jar
Melissa K Norris – Re-Usable Canning Tattler Lids-Do They Really Work?
Real Food Living – Preserve and Store Grains wiith Dry Ice
Cooke’s Frontier – Smoking
Homestead Dreamer – Water Bath Canning
Evergrowing Farm – How to Preserve Red Chile
Survival Sherpa – Modern Mountain Man MRE’s
The Backyard Pioneer – Fermentation
Trayer Wilderness – How We Preserve Food
Living Life in Rural Iowa – Vegetable Soup
The Organic Prepper – How to Make Jam without using added Pectin
Homesteading Mom – How I Preserve Broccoli and Goat Cheese Soup
A Matter of Preparedness – How I Preserve Using Mylar Bags


Brilliant! I wish I had seen this post before I pitted all those cherries! I’ve shared it at My Week on Wednesday! 🙂
~ Christine
Thanks Christine! Hopefully next time you pit cherries you’ll remember to save the pits to make some syrup 🙂
Thanks for sharing at the HomeAcre Hop!
Pinning on our HomeAcre Faves board 🙂
I just wanted to let you know that I’ve featured this post on the From the Farm Blog Hop! Also, I bought more cherries and made the syrup… and it was beyond delicious! 🙂
Thanks for sharing this with us, and I hope you’ll join us again this week!
~ Christine
Cherry Pits are poisonous. Is there a concern about the syrup?
I’ve heard that cherry pits are poisonous if you eat them. I did my own research and read that making syrup with them and other stone fruits is safe since you’re not eating the pit and the pits aren’t broken open. A lot of folks make liquors and extracts with stone fruit pits and we’ve done this also with no problem. We’ve been making syrups like this for a couple years and have never had any issues. We also have accidentally had a cherry pit make its way into our smoothie (was in a cherry that went through the pitter but the pit was missed) and we drank the smoothie and had no issues. That is our own personal experience and I suggest folks do whatever they feel comfortable with.
I wouldn’t have thought about making the syrup, we did however make cherry pit vinegar to turn into dressing for out salads! On the poisonous bit….You have to ingest a fairly large quantity of pits for it to be harmful. A pit here or there shouldn’t be a concern and as long as you are using uncracked, healthy looking pits for your syrups and vinegars then it is perfectly fine. Thanks for the great syrup idea!
Two things: As Crystal B said, You’d have to eat a lot of pits to hurt yourself AND they’d have to be cracked/hulled! Unless you thought of choking on a few whole ones..?
Even the used up pits are not useless! After you’re done making syrup or vinegar or whatever, those fruit stones should be spotlessly clean. Simply tie or sew them into a cloth sack and microwave or heat in the oven (I wouldn’t turn on the oven specially for this-use the residual heat after supper comes out.) and throw it under the covers to warm cold toes at bedtime or lay it over stiff muscles. A thrifty tip from my depression-era, Swiss mother.
If you have enough pits, you can fill small pillows, too. I have one I use in bed when my neck is really bothering me — the cherries move around and give a bit of gentle massage AND conform to the shape of my neck, so no pushing my neck one way or the other.
I also made a biggish flat pillow that I put under my desk for massaging sore feet when I’m on the computer — remove shoes, of course!
AND, lastly, in the Middle East, they dry and finely grind the pits to make a seasoning that’s used in baked goods. It’s kind of a cross between cherry and almond in taste. You only use a little, and they’ve been doing it for millenia without killing themselves. Could be the drying changes things??? Or the fact that very little is used — it’s a spice. Do enough research that you are comfortable with it, don’t rely on someone else’s ideas.
I’m new to homesteading and have been wanting to plant cherry trees. This is something I’m going to have to remember when I do. Thank you for sharing.
Do you know that cherry pits have some arsenic in them? Be careful, don’t use too much in food.
Do you think this would work with mango pits?
I read this post a few weeks ago, and was lucky enough to come into a few pounds of cherries recently. We pitted them for preserves, and I used the pits for syrup. Oh my goodness. I had no idea what I’ve been tossing for years. Never again will i compost pits without making syrup first. Delicious. I used it with some bubbly water and loved it. I plan to stir a little into yogurt later. I’ll use it in smoothies. Thanks for sharing! I’m a syrup convert!
So glad you found this helpful! It really is amazing how much useful cherry flesh is still on the pits after pitting them!
OES have a cherry taste at all. Next time will not use honey