How to grow sprouts at home
Last Updated on January 13, 2025 by Annie Bernauer
Years ago I learned how to grow sprouts at home so we could have fresh, healthy greens to eat throughout the winter. I’m always looking for ways to save money on our grocery bill so learning how to grow sprouts seemed like an easy, fun way to save money!
Our winters in Montana are long and cold so having access to fresh, homegrown greens is tough. I have plenty of homegrown greens preserved in the freezer like spinach, chard, kale and beet greens but they just aren’t the same as fresh, crisp homegrown greens.
I used to buy fresh greens from the natural grocery store in town over the winter but it is shipped in from out of state. To provide our family with fresh homegrown greens throughout the winter, I set out on a mission to learn how to grow sprouts at home. I started growing sprouts at home over a decade ago and I’m here to tell you it is so easy and they are so delicious and nutritious!

Is it better to grow sprouts in a jar or a tray?
There are several methods to growing sprouts at home. I have some friends who grow sprouts in a jar using sprouting kits like these. The nice thing about sprouting seeds in a jar is that you can do a large quantity at one time. If you eat a lot of sprouts and can consume the fresh sprouts in a couple days before they start to deteriorate, this could be a great fit for your family.
Years ago I invested in one of these seed sprouting tray sets from the Amish market we shop at every couple months. They have one whole aisle dedicated to homesteader supplies which I always peruse when we’re there since we’ve found some great tools for our homestead.
What I love about the seed sprouting trays we bought is that there are four different trays which allows me to grow in succession. Our family can’t eat a huge pile of homegrown sprouts before they go bad.
Instead, I start seeds sprouting in one tray then a few days later start seeds in the next tray and so on. I even sprouted some seeds in a tray to share with our chickens since they’re also not getting fresh greens this winter unless we have some in our food scraps!
Which seeds are best to sprout?
There are many types of seeds that you can sprout to eat. My favorite type of sprouts are alfalfa sprouts, the type that are most commonly found in the grocery store. They have a mild flavor and even my kids will eat them!
We also bought a bag of this seed sprouting salad mix which is a mix of broccoli, alfalfa, clover and radish seeds. This mix has a little more spicy flavor and some of the sprouts grow a bit stockier than the alfalfa.
Sprouting seeds at home has become quite popular compared to when I first started sprouting seeds years ago so there are now a wide variety of sprouting seed mixes on the market. I suggest folks test out a few types of seed mixes and decide which flavors you prefer.
If you save your own seeds, you can also sprout your own seeds or make your own seed mix. We’ve been saving our own seeds for many years so we are actually going to experiment with making our own homegrown sprouting seed mix this year!
How long do sprouts take to grow?
The time it takes to grow sprouts at home depends on the types of seeds you are using to sprout. Some seeds will start to sprout within the first day or two. Other seeds take a bit longer to sprout and start to grow.
On average, the seed mix we use takes 5-6 days to sprout and be ready for eating. This is why having a seed sprouting kit with multiple trays for succession seeding is so handy!
One word of caution from personal experience, it is best to not mix seeds with major differences in sprouting time. What happens is the quick sprouting seeds will be ready to eat but the slower sprouting seeds are just starting to grow and not ready yet. The roots of the sprouts are all intertwined so it’s a mess to try and separate out the ones that are ready to eat.
How to grow sprouts at home in a seed sprouting tray:
1. Pre-soak the seeds. Soaking the seeds for a few hours helps them to germinate more quickly. We use 1 TBS of seeds per tray in our seed sprouter. To soak them, I pour the seeds into the bottom tray with no holes, cover them with water and let them sit for 4-8 hours.

2. Drain the seeds. Drain the water off the seeds and pour the seeds into the seed tray. One of the features I love about our seed sprouting trays is that there are drain holes on the bottom of each tray. This makes it easy to drain the water off after soaking the seeds. After soaking the seeds for a few hours, some of the seeds start to sprout!

3. Let the sprouting begin! I sit the seed tray on top of the base tray and loosely sit the lid on top of the tray without sealing the lid. Our house is so dry that sitting the lid loosely on top helps hold in some moisture. I sit our seed sprouting tray on the kitchen counter.
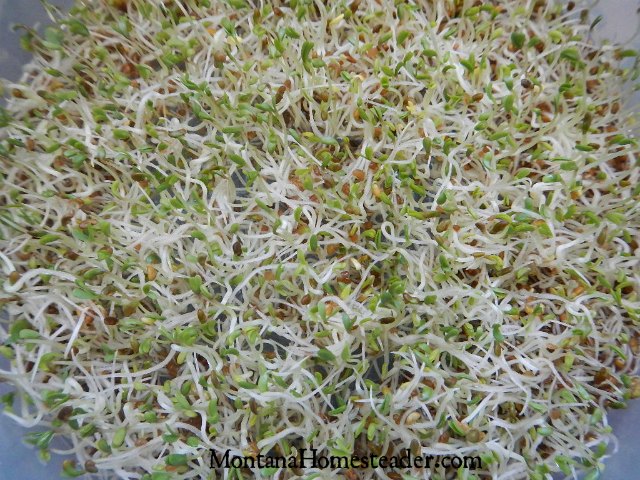
This allows them to have a little light but not so much bright sunlight that they burn up or dry out. By day two there are definite signs of seed sprouts in there. By day three there are lots of little green leaves visible on the sprouts!

4. Water the seeds. The seeds should be watered about three times per day. I try to remember to water them first thing in the morning, around lunch time and then after dinner. When sprouting seeds in a seed sprouter like the one we have, all you need to do is pour about two cups of water into the seed tray.
The water will slowly drain out the holes in the bottom of the tray and filter into the base tray. Just remember to empty the base tray each time or it will overflow and create a big mess!
When sprouting more than one tray at a time, I water the top tray and then the water flows down through the holes in the tray to water the next tray. The excess water ends up in the bottom base tray.

5. Harvest the sprouts and eat them! The seeds start sprouting quickly and we’ve been able to eat fresh sprouts as early as four days after we started sprouting them. I’ve also let them grow as long as five or six days.
To harvest the sprouts, remove the sprouts from the seed tray and place them in a bowl. Fill the bowl with water and swish the sprouts around. This will loosen up any seed hulls that will float to the top and you can scoop them out. Any seeds that did not germinate will float to the bottom.
Scoop out the sprouts and place them on a towel to let the excess water drip off. Now you can eat your delicious homegrown sprouts!
You could skip this step but I’ve read that the seed hulls can be bitter at times so I try to remember to scoop them out since that’s how my kids prefer them. I personally have been known to grab a clump of sprouts fresh from the tray and eat them right there on the spot. Delicious!
How to store homegrown sprouts
If we have any sprouts that were harvested and not eaten right away, I put them in a covered glass storage container in the refrigerator. As long as most of the moisture is drained off, we’ve had them last up to four days in the refrigerator.
I’ve learned that the key to helping sprouts last longer in the refrigerator is making sure most of the moisture is drained off before storage. You don’t want them to be bone dry or have a puddle of water in the bottom of the container. I’ve found that sprouts store best when just a little damp.
If you want to learn how to grow sprouts at home in a glass jar, here’s a great post from Grow Forage Cook Ferment. Another option to have fresh homegrown greens in the winter is growing micro greens. We currently don’t have a good spot in the house to try this but some day I hope to. Here’s a post from Attainable Sustainable that explains how to grow microgreens at home in case you want to give it a try.
Do you grow sprouts at home and have any tips to share?
This post was originally published on February 24, 2016 and updated and republished January 13, 2025


I have sprouted seeds in a mason jar equipped with a screened top so you can rinse them, ie. water them. Is there a place where one can order the tray you have? I love your site. You have a lot of great ideas! Thank you for what you are doing.
Thanks for visiting and glad you are enjoying our blog! Here’s a link to where you can buy online the type of stacking tray seed sprouter we have http://amzn.to/1R9450h