Preserving Beet Greens
Last Updated on January 27, 2023 by Annie Bernauer
Have you ever wondered what to do with all your beet greens? They’re so good for you but one can only eat so many beet greens in one week before getting sick of eating them. Beet greens are full of vitamins and minerals so it seems a waste to just throw them in the compost bin. A few years ago I faced this dilemma. I preserve kale, chard and spinach so I figured beet greens could be done the same way. I gave it a try and it turns out preserving beet greens are easy and a great way to serve up healthy homegrown food throughout the season! We love to use them in quiche, stir fries and soups all year long.
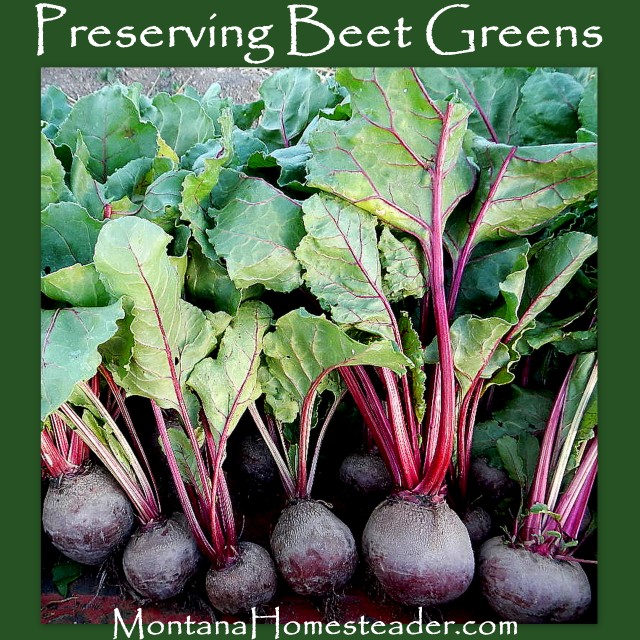
One of the heartiest vegetables in our garden this year are the heirloom beets. The beets and peas were the first seeds I planted in the garden this spring before the drought started. While the birds ate most of the 100+ pea seeds I planted, the beets germinated and thrived. This weekend I harvested about 1/3 of our beet patch, which was a little over 40 beets. I only harvested the biggest beets so the rest will continue to grow and be harvested another day.

I love to make and can pickled beets so decided I would preserve the beet greens at the same time. I figured if the kitchen is already hot and messy from canning, I might as well just do it all at once and have one big mess to clean up!
Preserving Beet Greens Tutorial
The process to preserve beet greens by blanching only took about a half hour and then another hour or two to dry before being packed into bags for the freezer.
Step 1: Cut the beet leaves off the beet and leave the stem attached. Discard any yellow/brown leaves. Tear off and discard any part of the leaf that may have a hole where a bug nibbled. Stack a bunch of leaves on top of each other on a cutting board. Slice the leaves into thin strips and the stems into bite size pieces.

Step 2: Place the sliced beet greens and stems in a blanching pot (this is the one we have and it works amazing!) Blanch the beet greens in boiling water for three minutes. Then immediately remove the inner pot filled with greens and run cool water over them. Pour them into a sink or large bowl filled with ice water to cool.

Step 3: Remove the cooled beet greens from the ice water and spread them evenly on a towel. Allow them to air dry for an hour or two.
Step 4: Pack the beet greens into plastic bags or if you have a vacuum sealer you can pack them that way. I’m still dreaming of the day when we own a vacuum sealer. For now I use the cheap DIY method of vacuum sealing: the straw method. If you’re not familiar with this, I’ll give you a quick tutorial. Pack the food you want to freeze in a plastic zip bag. Place half the straw in the bag on one side of the bag. Zip the rest of the bag closed.
 Suck all the air out of the bag and as you do this, slide the straw up and out of the bag while simultaneously zipping the bag closed. It might sound tricky, but you’ll get the hang of it fast. You will be left with a nice air tight bag that looks similar to a vacuum sealed bag.
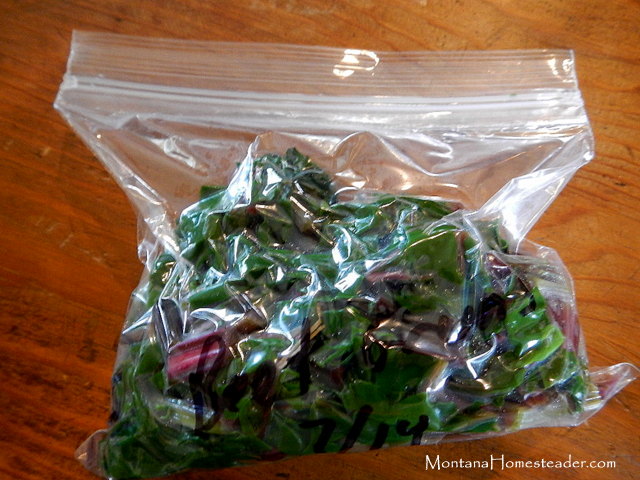
Step 5: Once the beet greens are all packed into air tight bags, they should be placed in the freezer. The less moisture they have on them when you pack them into bags, the longer they will last and not get freezer burnt. They should last for up to a year in the freezer if you don’t eat them all before then!
Have you ever preserved beet greens? How do you do it?


I have never tried beet greens but love collards and kale so I assume these would taste the same. I am anxious to try some. I love vegetable that you can use the whole plant and nothing goes to waste! Thanks for sharing.
The beet greens have a slightly different taste than kale but they are delicious! I totally agree that it is wonderful to use the whole plant and have little to no waste!
A friend just brought me two bushel bags of beets. Lots of nice greens on these beets. We love greens of all kinds, but never tried beet greens. I just sauted some sweet onion, a little minced garlic, in a little EVOO, added greens, salt, pepper a tad of crushed red pepper flakes and about a cup of chicken broth, covered and cooked until greens wilted down. OMG, tastes a lot like spinach with a kick of collards. Husband was really impressed…Will freeze the greens for future meals.
Beet greens aren’t nearly as bitter or thick as kale or collards. They’re most like swiss chard, I’d say.
They are Swiss chard. Same green different name.
Do they need to be blanched if freezing for smoothies?
Its my understanding blanching kills enzymes that makes the greens spoil
I like them best of all the greens. Try them with butter salt and vinegar
Awesome!!
I am always so happy to see someone else who eats the greens. So many people I know toss them in the compost, and it boggles my mind! Beet greens are so good, why throw them away?
I used to freeze my extras, but now I pressure can them. I love being able to grab a jar off the shelf and enjoy!
I love them on pizza, in omelets, or just sauteed in butter with a healthy mound of parmasan cheese. 🙂
Ooohhh, I didn’t even think about putting them on pizza! I think we’ll have to try that since homemade pizza is one of our favorite things to make and we eat it at least once or twice a month.
Do you can them like you would regular greens? I have a bushel basket and want to can them instead of freeze them. I love greens!
Wonderful! I have never preserved beet greens before. Thank you.
Thank you for stopping by!
Great tips! I may try this method with our abundant kale harvest!
We do the exact same thing with a variety of greens like kale, chard and spinach. They are so easy to preserve this way and I love having homegrown greens to use in recipes all throughout the winter!
This is smart! I just added beets to the series Eating Inside the Box it would be awesome if you would share this with us! Please linkup any other recipes to any fruit/veggie category you’d like!
http://www.cultivatenourishing.com/beets/
Enjoy the Harvest!
Lindsey
Thank you for stopping by and sharing about your great website- I can’t wait to check it out!
I fell in love with growing beets this year! I tried it for the first time on a whim, and I’m totally hooked. I’ve also ended up composting a good amount of greens. They’re delicious, but like you said, you can only eat so much in a week. I didn’t even think of trying to preserve them (rather, I lamented on not having any livestock to feed them to). This is a great idea!
Love this! I have never preserved beet greens but I love them sautted in garlic or as part of salad greens. So nutritious and I love the earthy flavor they have! Thanks for sharing. Definitely pinning this to try later.
Gorgeous beets! Ours are smaller but maybe we just grew the wrong kind. We juice our beet greens so we dont generally have any left over, but I will certainly keep this in mind if we do. Thanks for posting. 🙂
Every growing season I carefully count how many bags of beet tops I can freeze for the winter. I blanche them for 60 to 90 seconds, then into the chilled water and after draining into bags for the freezer. This year I started weighing them and figure 1/2 pound (weighed while slightly damp) is enough to for two people for dinner. I steam them in the microwave and serve them with butter and vinegar. I use fairly young/tender leaves so they would never stand up to your length of blanching but they do need a fair bit of cooking to get them edible from the frozen state. I used to boil them but found they lost a bit of their flavour. I treat beets as a cut and come again crop so the beets themselves never have the chance to get very big. Means less “big” beets at the end of the season but the smaller beets also make for easier canning. Sometimes we even buy a bag of the big beets because they taste soooo good roasted in tinfoil in the ashes of the wood stove. Right now I’m considering making some spanikopita with phylo dough and beet tops. Just because they taste good that way too. Some of them might even make it to the freezer.
Do NOT worry about not having a vacuum sealer. We have one, and it’s more of a pain in the neck than it is useful. I think your straw technique is a better value, and it takes up less space.
Loved this post! I’ll be featuring it on Thursday’s HomeAcre Hop. I hope you’ll stop by and share again.
Kathi at Oak Hill Homestead
I was starting a batch of sauerkraut when I came across a bunch of beet greens in the refrigerator that I’d trimmed the day before. They were chopped and added to the brine and cabbage, along with some fresh dill. Everything fermented within a week and the results were delicious and slightly pink!
What a great idea to add the greens to your ferment, sounds delicious!
In case you haven’t tried it yet, kohlrabi greens are pretty tasty in soups and salads too. I generally only use the younger undamaged leaves though.
We also preserve our kohlrabi leaves using this same method 🙂
Love canning beets, pickled beets and beet greens. Use the canned greens during the winter for salads. Mix with a sprinkling of balsamic vinegar, fried bacon crisps, pecans or walnuts and a grated cheese of choice. Top with homemade croutons. We also add other fresh veggies and/or fruit, whatever is in season or available. One of my favorites is adding Kumquats, or grapefruit, which are indigenous to the area in which I currently live.Hope this will inspire a variety of combinations for your menus. ~ Mari
hi i just read your post. do can your beet greens?
I usually freeze beet greens in the same way I would chard, but last year I tried something a little different. I canned them in a mild vinegar solution. I usually add vinegar after cooking them anyways, so I just called them pickled beet greens.
So excited I found this article as it made things much qukirec!
Love your way of freezing beet greens, thanks a BUNCH. I will be trying that, just no way I can keep up with them as hubby won’t try them.
Was wondering if you have a recipe to make KALE CHIPS? I tried once, got way to much salt on them & they were chewy not crisp, is that the way they should be?
Thanks for any help. I love Montana, born in Lewistown the middle of the state, now I live in the middle of Washington state, in Ephrata.
I don’t have a web site, sorry.
I don’t live on a farm but I do have a garden. Kale and beet greens also chard. This is funny you see I have no teeth. So I . Started dehydrating things likeable chard and there greens since I have a hard time Chewing leafy veggies. After there dried out I put them in my personal blender and pulverized them that way I still get the nutrition and taste but not there uncharitable texture. Use in soup stews and anything I feel needs a lit kick.
Thanks for starting the conversation! The other day I tried a method usually used with mustard greens. I chopped the beet greens, then hand mixed with a few spoonfuls of salt. After squeezing out excess juice, I put it all in a jar in the fridge. It’s developed into a lovely salty lightly pickled flavor in just a few days. I here it keeps for up to 3 months in the fridge. I had it with scrambled eggs this morning (was yummy!) and plan on trying to cook with it in other recipes.
I am very limited with freezer space so this year I am drying beet and turnip leaves by hanging over my wood stove in old potato sacks and one steel front off of an old fan.. I have been doing that for several years with dandilion leaves and plantain so I thought why not give this a try.. Once dry I crust them and then use them on salads and varios other dishes. It’s time consuming to pich enough dandelion leaves to last through the winter but it looks like this will be a good substitute. By the way, raw dandelion roots are excelent in fresh salads.
Would love to can beet greens, but have never done so.any know how much time to process and at what pound of pressure. Thank you , love reading your comments.
Thank you for the tip! How do you cook them up when you’re ready to pull them out of the freezer? Does the consistency of the greens hold up, or are they better suited to be used like chopped and cooked spinach? Thank you!
Is it necessary to blanch them first? Can’t you just chop and freeze? Thank you 🙂
My understanding is that blanching does two things: (i) kills unwanted bacteria, and (ii) reduces the volume of the greens. Both seem like good reasons to me!
Thanks, Montana Homesteader, for the posting. Your “blanching pot” is our pasta pot–and it worked perfectly! As did the straw.
I chop the greens a little finer after drying and put them in ice cube trays. Once frozen, I put them into freezer bags. I love to through a couple of cubes into my soups.
thank you for the article!
Loved the article, will have to try several different ways. When I was little we always washed and dried them, then egg, flour, salt and pepper and fried them. Topped with parmesan and I like a little garlic salt, they’re delicious this way. I just got a bushel from the farm and they threw in the tops because I have chickens, then I thought, I should do something with these for us. I’m gonna try some fermented this year and see how they turn out too.